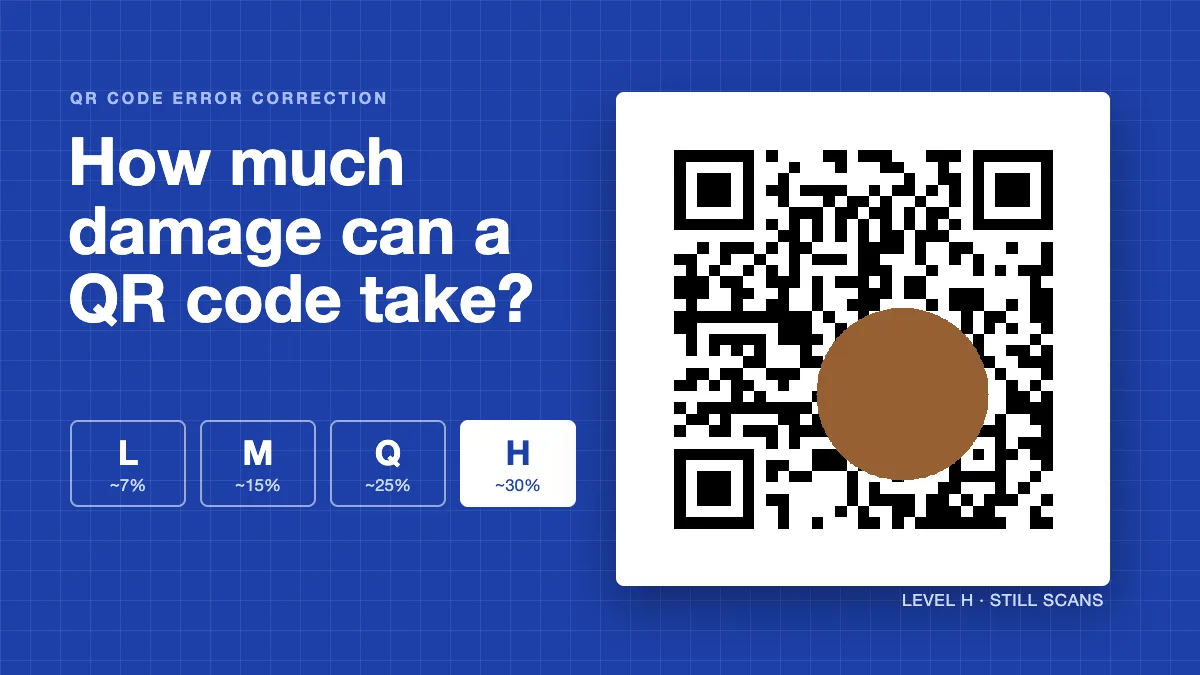
A QR code can survive a scratch, a coffee ring or a logo stamped across its middle and still scan. That is not luck: every code carries extra recovery data, and how much it carries is set by its QR code error correction level. There are four levels, L, M, Q and H. This guide explains what each one actually recovers, what you pay for the extra safety, and which level fits packaging, shelf labels, outdoor signs and codes with a logo.
What QR code error correction does
A QR code stores your link as a sequence of 8-bit blocks called codewords. When the code is generated, an algorithm called Reed–Solomon error correction adds extra codewords calculated from your data. When a scanner reads a code with some modules (the small black and white squares) missing or wrong, it uses those extra codewords to rebuild the original data, much like a checksum that can also repair what it detects.
The QR code standard, ISO/IEC 18004, defines four levels. The percentages below are the approximate share of codewords that can be restored, as published by Denso Wave, the inventor of the QR code, and summarised on Wikipedia's QR code article.
| Level | Recovers about | Typical fit |
|---|---|---|
| L (Low) | 7% of codewords | Clean surfaces and screens, or when you must pack in as much data as possible |
| M (Medium) | 15% | General print: flyers, menus, posters, most marketing material |
| Q (Quartile) | 25% | Surfaces that get handled, rubbed or weathered |
| H (High) | 30% | Harsh conditions, small or curved prints, and codes with a logo on top |
Two details people usually miss
- The percentage is about codewords, not area. "30%" does not mean you can cover any 30% of the square. A blot that clips many codewords partly can cost more than its size suggests, and a clean blot can cost less.
- Some parts are not covered at all. The three large squares in the corners (finder patterns) are how a scanner locates and aligns the code. Damage them badly and the scanner may never find the code, whatever the level. The quiet zone, the empty margin around the code, matters in the same way.
The same damage at four levels
To show the difference, we generated one short link at each of the four levels, printed them at the same size and put an identical blot in the same place on each. Then we tried to decode every version with two independent readers, OpenCV and jsQR.
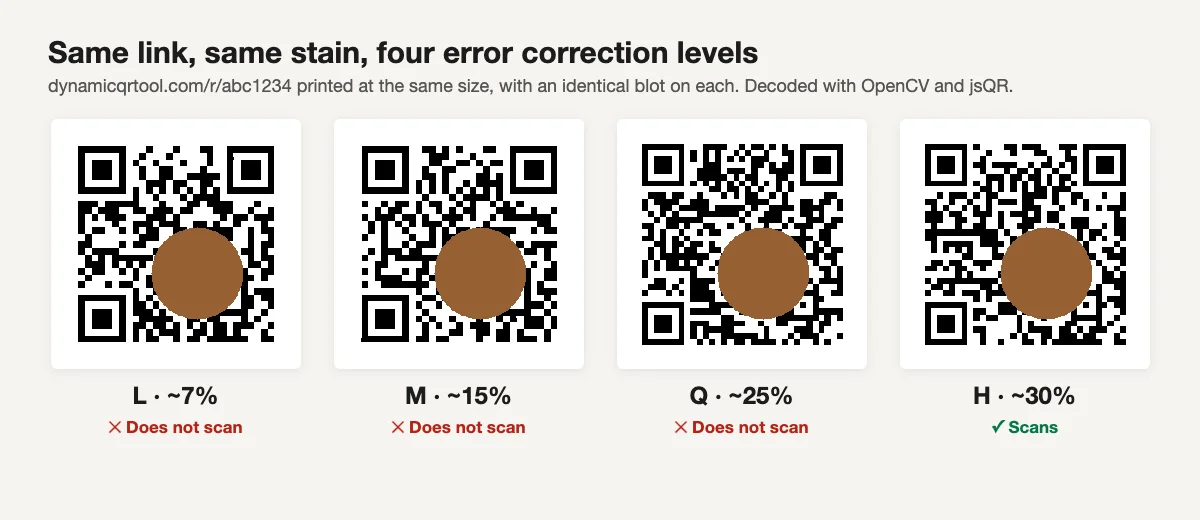
Both readers agreed: L, M and Q failed, and H still returned the link. With a smaller blot, Q and H scanned in both readers, L failed in both, and M scanned in one reader but not the other. Real phones use different decoders, and the exact limits depend on where damage falls, so treat this as an illustration rather than a rule. The direction is consistent, though: each step up buys real tolerance.
The trade-off: higher levels mean denser codes
Recovery data is not free. It takes space in the code, so at a higher level the same link needs more modules. QR codes come in 40 sizes, called versions: version 1 is 21 × 21 modules and each version adds four modules per side. When the data no longer fits, the generator moves up a version.
More modules in the same printed area means each module is smaller. Smaller modules need a sharper print, a steadier hand and a closer phone. So a higher level makes a code tougher against damage but slightly harder to read from a distance or in poor print quality, unless you print it bigger.
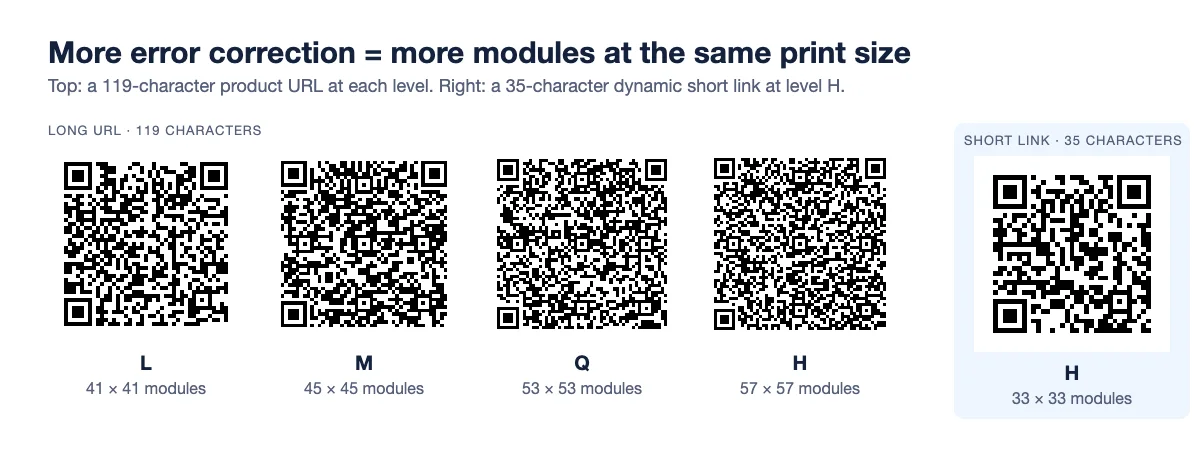
The image above shows real codes. A 119-character product URL with tracking parameters needs 41 × 41 modules at level L, and 57 × 57 at level H. That is a big jump in density for the same printed size.
Why short dynamic links change the maths
Look at the right-hand code in the same image. A 35-character dynamic short link encoded at level H needs only 33 × 33 modules, fewer than the long URL at level L. In other words, shortening the data gives you maximum error correction and a less dense code at the same time.
This is one of the practical benefits of a dynamic QR code generator: the code only stores a short redirect link, and the long destination address, with all its tracking parameters, lives on the server. You can change that destination after printing, and the printed code stays small and robust.
Error correction and data length pull against each other. Keep the encoded text short, and you can afford the highest level without making the code dense.
Which level to choose
If your generator lets you pick, here is how to decide by situation.
Product packaging
Packaging gets squeezed in bags, rubbed in transit, printed on curved or glossy surfaces and sometimes printed small. Go for Q or H. If you are adding a brand logo in the middle, use H. Our page on QR codes for product packaging covers where on the pack to put the code.
Shelf labels and price tags
Shelf labels are small, printed on thermal or low-resolution printers, and get scuffed by stock and trolleys. The small size argues for low density, the wear argues for high correction. The way to get both is short data: encode a short link at Q or H instead of a long product URL. See QR codes for shelf labels for label-specific tips.
Outdoor signs and anything exposed to weather
Sun fades ink, rain warps paper, and stickers peel. Use H and print a generous size; an outdoor code also tends to be scanned from further away, so it needs bigger modules anyway.
Screens, slides and clean indoor print
A code on a screen or a clean, flat flyer rarely gets damaged. L or M is enough here, and if the data is long, a lower level keeps the code readable at a distance. With a short link, there is no real cost to using a higher level.
Codes with a logo
A logo placed over the centre hides modules, and the scanner treats those as damaged. The logo spends part of the error correction budget before any real-world wear happens, so use H and keep the logo modest in size. Our guide on how to add a logo to a QR code goes into sizing and contrast.
What Dynamic QR Tool uses
Dynamic QR Tool does not ask you to pick a level. Every code it generates uses level H, the highest one, whether you create a dynamic code, a static URL, text, WiFi, vCard or email code, and whether or not you add a logo. Because dynamic codes only encode a short redirect link, they stay relatively low-density even at level H.
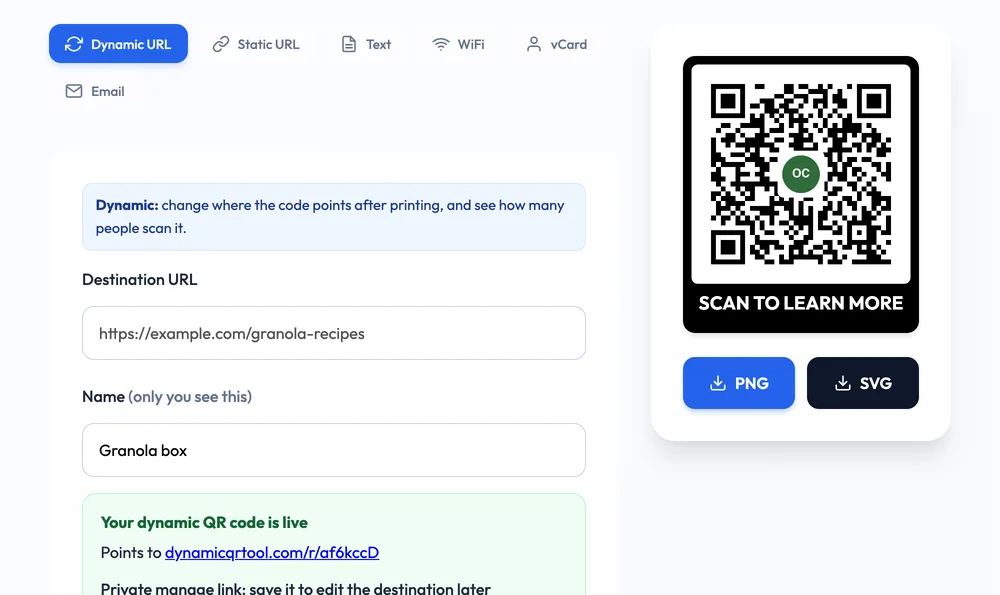
When you upload a logo, the tool places it on a light backing square about a quarter of the code's width, which is less than 7% of the code's area, so plenty of the level-H budget remains for scratches and wear. Static codes are a different story: a long static URL, WiFi password or vCard can still make a dense code even at level H, which is one more reason to prefer a dynamic link for anything printed.
A quick checklist before you print
- Shorten the data. Use a dynamic short link rather than a long URL with parameters.
- Match the level to the surface. M for clean print, Q or H for handled or outdoor items, H for logos.
- Protect the corners and margin. No level can rescue damaged finder patterns or a missing quiet zone.
- Size for the distance. Denser codes need more space; our QR code size guide has practical minimums.
- Test the real print. Scan a proof on the actual material with several phones. Our checklist on how to test a QR code before printing walks through it.
Error correction is a safety margin, not a substitute for good printing. Choose the level for the conditions the code will live in, keep the data short, and test before the print run, and your code will keep scanning long after the packaging has been knocked about.